
With Chinese New Year on the horizon, everyone wants to look their best. New clothes, new bag, new shoes and maybe even a new hairdo would indubitably make it onto the checklist. But when you’re a busy mum, even the best laid plans can go awry and with no time on your hands, the last thing that you want to worry about is spending an inordinate amount of time fixing your hair.
As mums, we hear you and we definitely feel so. Which is why we’ve picked the brains of celebrity hairstylist June Ng, director of J’s Salon, who has shared with us some easy, peasy hairstyles that will take you from drab to fab in just a few minutes! After all, she’s a mum herself so we knew that we’d be in good hands.
PLEATS PLEASE
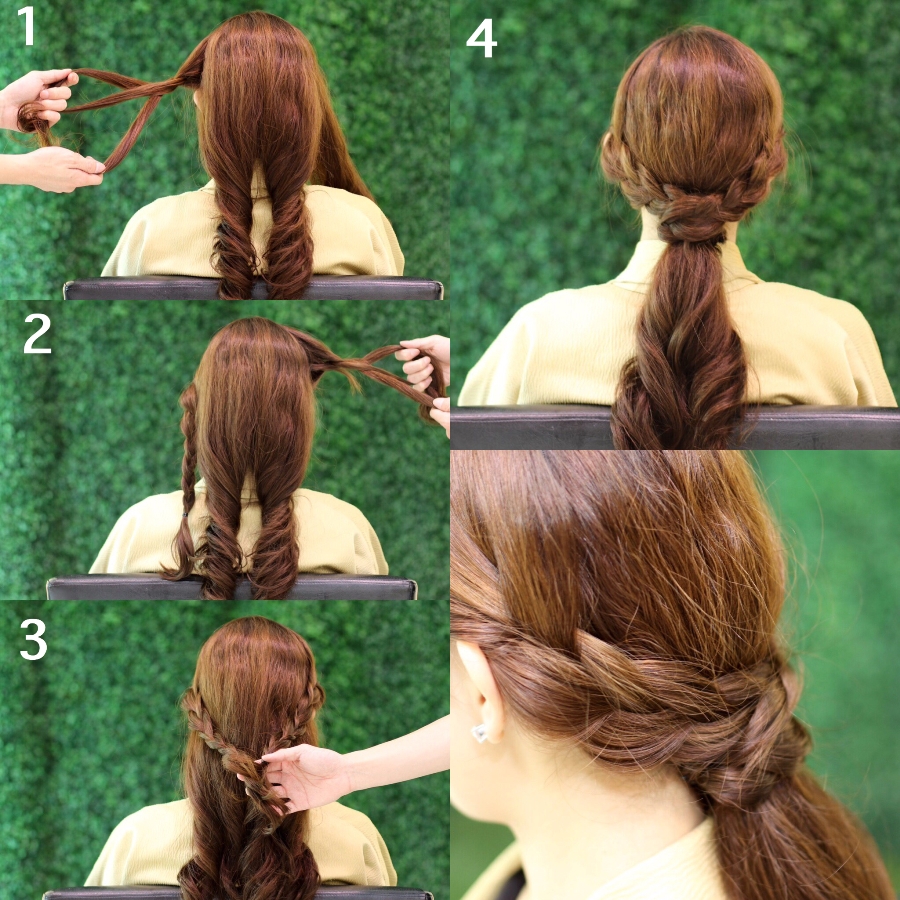
Step 1: Divide hair into four portions
Step 2: Do a simple braid on the left and right most portions.
Step 3: Pull the braids together and secure with bobby pins to form one big braid.
Step 4: Use the braid to wrap around the rest of the hair as though you’re tying a ponytail. Secure with bobby pins.
Voila!
PRETTY UP DO WITH A TWIST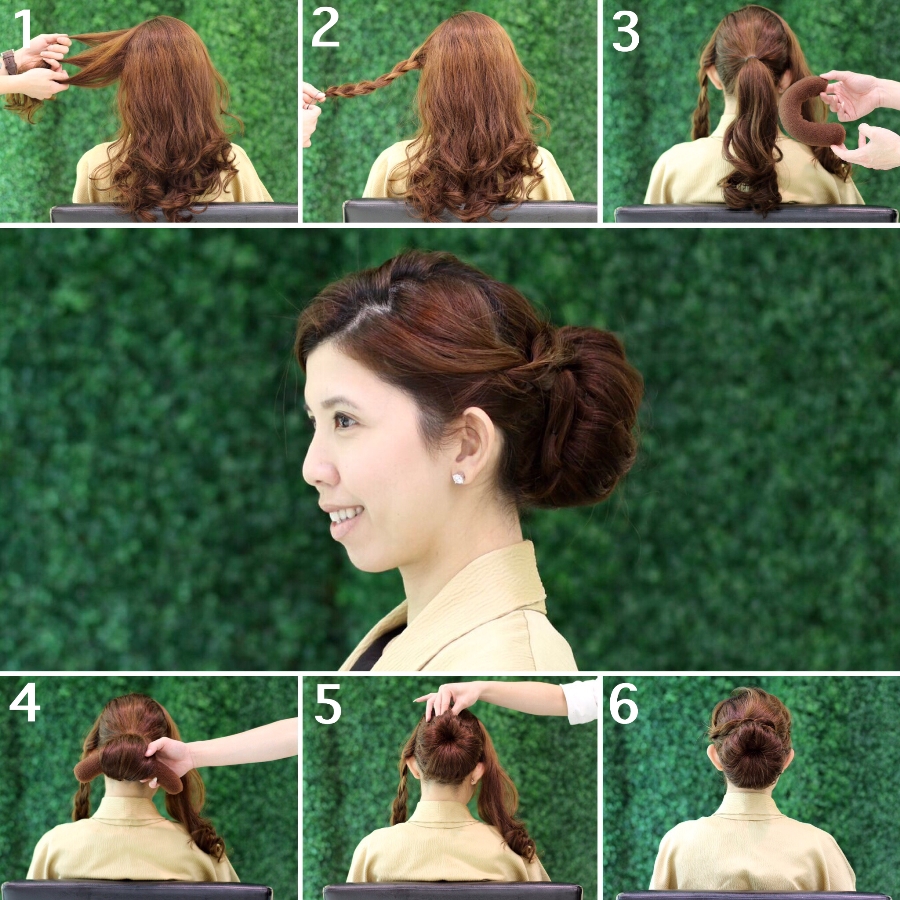
Step 1: Separate a small portion of hair on the left and right sides of your head.
Step 2: Tie a braid using the hair on the left.
Step 3: Tie a pony tail with the remaining hair in the middle.
Step 4: Using a hair sponge, twist the pony tail around from bottom to top
Step 5: Twist sides in to form a bun.
Step 6: Using the hair on the right, wrap it around the bun and secure with bobby pins. Then, wrap the braid around the bun and secure with bobby pins.
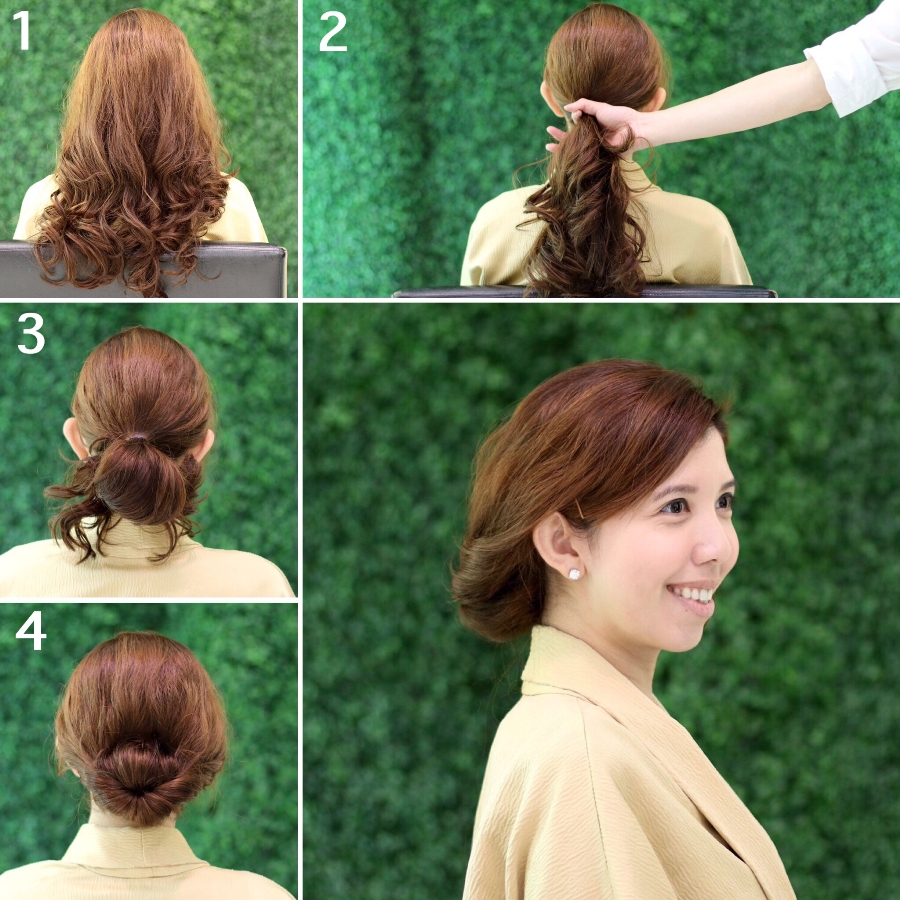
Step 1: Leave hair tousled and loose.
Step 2: Hold hair together and tie it into a loose bun by simply not pulling the entire ponytail out.
Step 3: Turn the bun inside out
Step 4: Secure any stray hair with bobby pins
TWO WAY STYLE
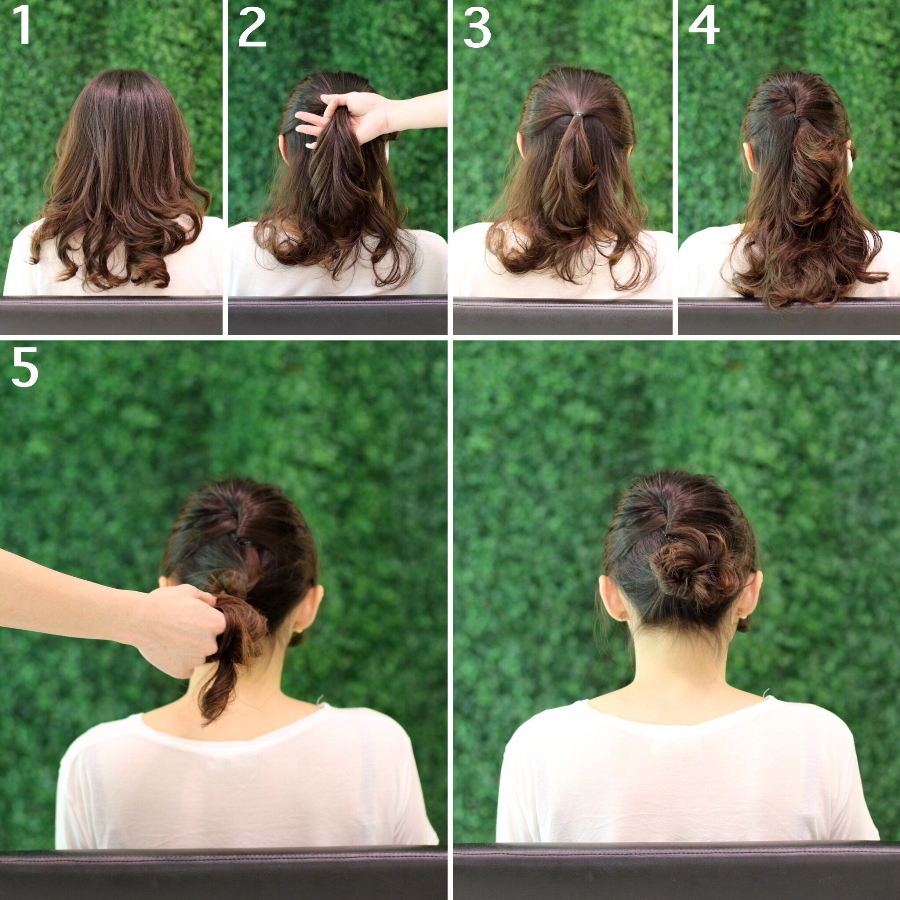 Step 1: Brush hair so it falls nicely down your back. Optional: Tong hair into curls.
Step 2: Form a half pony tail.
Step 3: Secure pony tail with a rubber band.
Step 4: Holding the pony tail with your right hand, give it a twist to the left. This will give your ponytail some height without having to backcomb your hair. You can stop here if you want to leave your hair down.
Step 5: Take all the hair and continuously twist it to the right to form a bun.
Step 6: Secure bun with bobby pins.
Credits:
Photography: Wil Surn Lim
Hairstylists: Team at J’s Salon
Venue: J’s Salon