Celebrate Father's Day with the dads in your life with these easy crafts and recipes you can make with your kids.
In light of Phase 2 of the country’s reopening, families can get together within the home with up to five visitors. While retail businesses, dining at food and beverage outlets, personal health and wellness, clubs and societies, and healthcare services will resume from June 19 at midnight, you may still prefer to be cautious and celebrate Father’s Day at home. If so, here are some of the crafts and recipes you can do with your kids.
Arts and Crafts
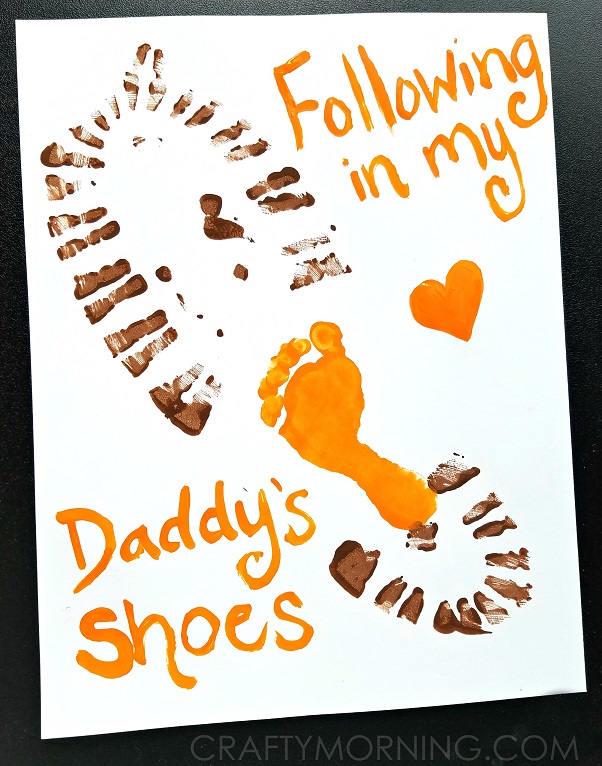
Following In My Daddy’s Shoes
What You’ll Need:
Orange and brown paint
Daddy’s shoe
Paintbrush
White cardstock paper that fits the shoe
Baby’s feet
Picture frame
Instructions:
First take dad’s shoe and paint it over with brown.
Stamp it on the white cardstock.
Next, paint your little one’s feet with orange paint.
Following this, stamp it inside the boot print.
Using the orange paint, finish the craft by writing “Following in my daddy’s shoes” and decorate it with a heart.
Put it in a suitable-sized picture frame.
Craft and image courtesy of Crafty Morning.
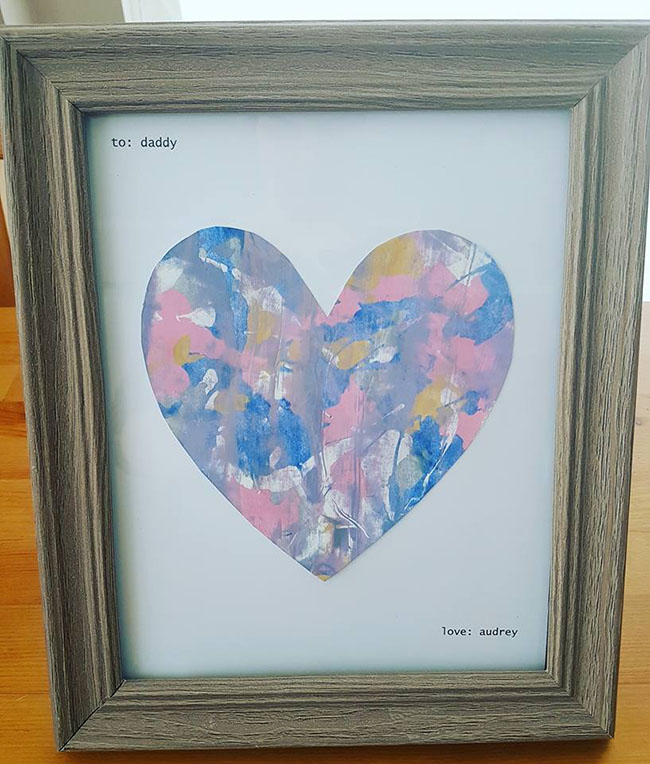
Mess Free Painting Father’s Day Card
What You’ll Need:
Three sheets of white cardstock
Paint, preferably washable
A large Ziploc bag
A picture frame
Instructions:
Put a few drops of paint on some cardstock in a large Ziploc bag.
Tape the end of the bag to ensure it can’t be opened by your toddler.
Under your supervision, have your toddler press the paint in any way they’d like – no matter how random.
Once your toddler has done so, take the page out and scrape off any excess paint, and let the page dry.
Find a frame, and cut the painted paper to fit the frame.
With the second piece of cardstock, write a message on both the top and bottom of the paper or print one off from your computer.
Next, cut a heart shape out from the middle of the second piece of cardstock.
Place this over the first page, and then paste to fit. Fit the paper in the frame.
Craft and image courtesy of The Best Ideas for Kids.
Chalkboard Mug

What You’ll Need:
An oven, dishwasher and microwave-safe mug
Oven-safe chalkboard paint
Paint brushes
Masking or painters tape
Scissors or exacto knife, if you want the shape to be more refined
Sharpie marker
Chalk for writing on
Newspaper to protect the table
Instructions:
Prepare your mug by washing it thoroughly with soap or wiping with rubbing alcohol to ensure the paint will stick well to the surface.
Create the shape of the chalkboard space by applying painters or masking tape in the desired shape and size. If you want a more refined shape, such as a speech bubble, you may want to draw the outline by first covering the entire mug with tape and then trimming away the shape. Just be gentle so you don’t scratch the mug.
Next, trace the shape with a Sharpie. If your chalkboard paint doesn’t bleed a lot, you could leave the tape, otherwise remove it and then paint inside the shape. Little ones can use a paintbrush to apply several thin, even coats. (If they make mistakes you should be able to wipe the paint off the edges, and you can do the final coat).
Once dry to the touch, clean up any edges. Wait for about 24 hours, and then remove any remaining tape. Place the mug in a cold oven, and set it to 150°C.
When it reaches that temperature, allow the mug to bake for 35 minutes, then remove.
Once cool, let your little ones write a special message for Dad or draw a picture.
Craft and image courtesy of Mommypotamus.
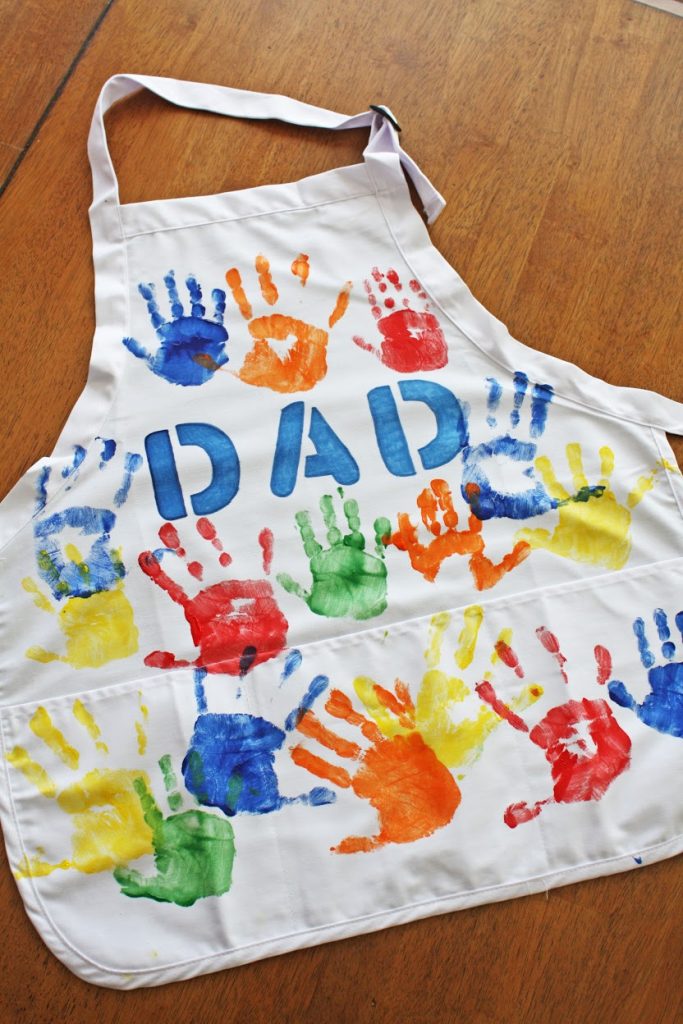
Father's Day Apron DIY
What You’ll Need:
Fabric paint
Foam paint brushes
Plastic cups
White men’s apron
Letter stencils
Pencil
Fabric marker
Instructions:
Prewash and iron apron, then position the stencils for the words on the apron. Trace the letters that spell “Dad”, then fill the letters with a fabric marker.
Next, fill the plastic cups with each of the colours you’re using. Then, paint on a layer of fabric paint to your child’s hand – paint each hand a different colour if you want to do two at a time.
Now, your child can press their hands on the apron. Repeat until the whole apron is covered with colourful handprints. Once the apron is dry, turn it over and iron it to “heat” set the paint before washing it.
Craft and image credit: Catch My Party
Father's Day Photo Gifts
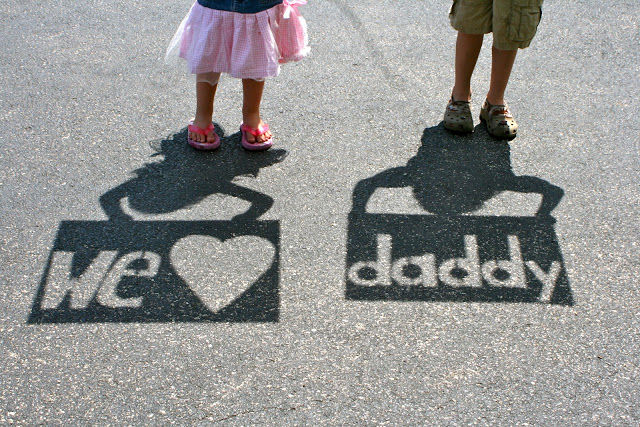
Another memorable category of presents for your husband or dads in your lives are photo gifts. These easy gifts just require a lot of patience in getting your child to sit for the photos.
“We Love Daddy” Shadow Photos
Another photo gift idea requires a little more effort, with two poster boards, and an exacto knife. Draw out the words We Love Daddy (or use a heart instead of “Love”), making sure to leave small lines between the letters so the words stay intact. Next, let the children (preferably toddlers and preschoolers) pose for the picture. Have them hold the poster boards in reverse and upside down. Make sure that the signs are held above their head so that it shows up better when the sun is high. Of course, frame the best photos as the Father’s day present.
Craft and image courtesy of The Little Backyard Farm.
“Dad” Photo Gift
You’ll need at least two letters D and A, which are large enough for your child(ren) to hold. To create a cohesive picture, use a three-picture frame such as this one from HipVan, and pose your child(ren) against the same backdrop. If your baby is still an infant, use white sheets as a backdrop, and let him/her grasp the letters while you take a plethora of photos to find the best. Once you’re done, print the photos out on photo paper and frame them up.
Recipes for Father’s Day
Lemon-Blueberry Pancakes
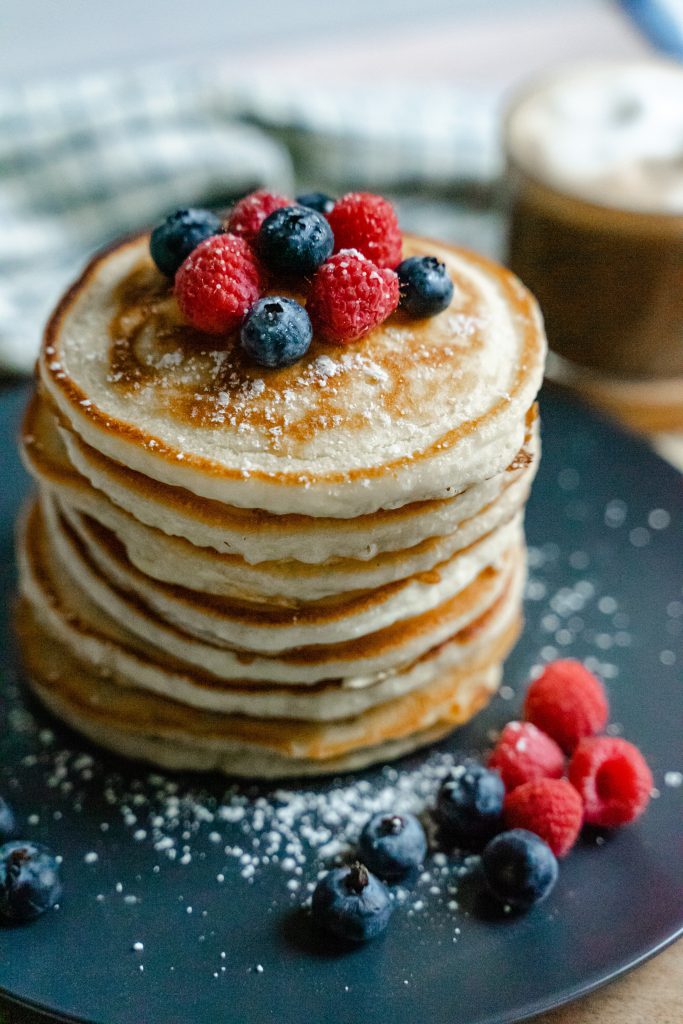
What You’ll Need:
200g plain flour
1 teaspoon cream of tartar
1/2 teaspoon bicarbonate of soda
1 teaspoon golden syrup
75g blueberries
Zest of 1 lemon
200 ml milk
1 large egg
Butter for cooking
Instructions:
First, put the flour, bicarbonate of soda and cream of tartar in the bowl. Mix well with a fork. Add the golden syrup, blueberries and lemon zest into the dry ingredients.
In a measuring jug, pour the milk and then break in the egg. Now, mix well with a fork and pour most of this into the bowl, and mix altogether with a rubber spatula. Continue adding milk until the batter is smooth and thick.
Heat a frying pan, then brush with a little butter. Next, spoon in the batter, a tablespoon at a time. Turn the pancakes once bubbles appear on top, using the metal spatula. After this, cook until brown on the second side. Repeat until all the mixture is used up.
Recipe and image courtesy of BBC Good Food.
Baked Spaghetti and Meatballs
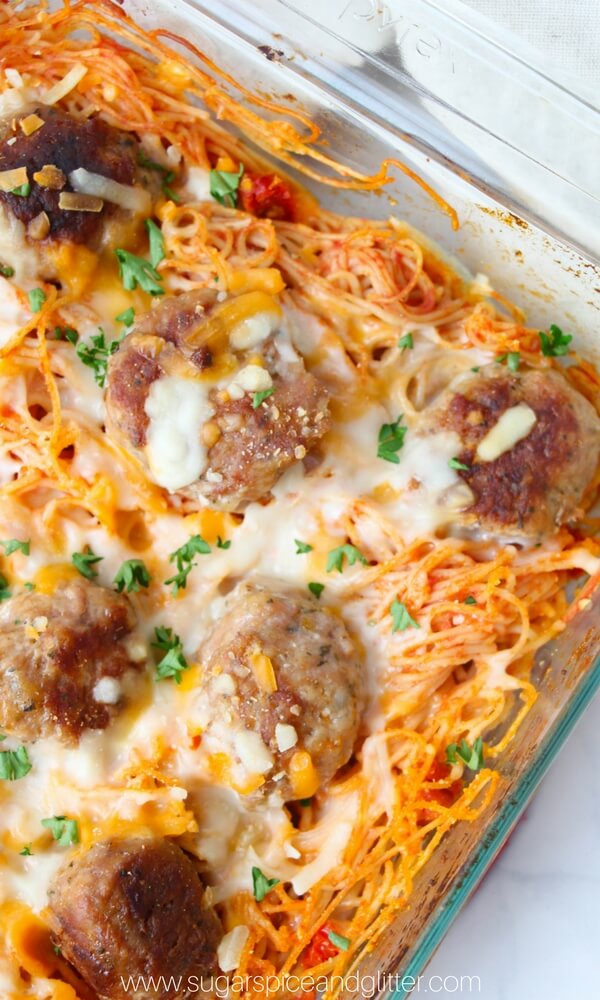
What You’ll Need:
3-5 cups cooked spaghetti
1 cup tomato spaghetti sauce
3 tablespoons sundried tomatoes
1/2 cup parmesan cheese, grated
10 plus meatballs, pre-cooked preferably
1/2 cup shredded mozzarella cheese, including extra for serving
2 tablespoons fresh parsley, chopped
Instructions:
Preheat the oven to 177°C. Next, add a tablespoon of olive oil to the skillet or frying pan over medium heat. Sear and cook your meatballs.
Meanwhile, cook your spaghetti to al dente, according to package directions. Next, drain the spaghetti without rinsing.
Afterwards, spread the spaghetti in the bottom of the casserole dish, and then stir in the tomato sauce. Season to taste with sundried tomatoes and Parmesan cheese.
Now, place the cooked meatballs on top of the spaghetti and cover with mozzarella. Cook until the cheese is melted for about 10-12 minutes. Sprinkle the parsley over.
Recipe from In the Kids’ Kitchen, and image credit: Sugar, Spice and Glitter
Roast Chicken
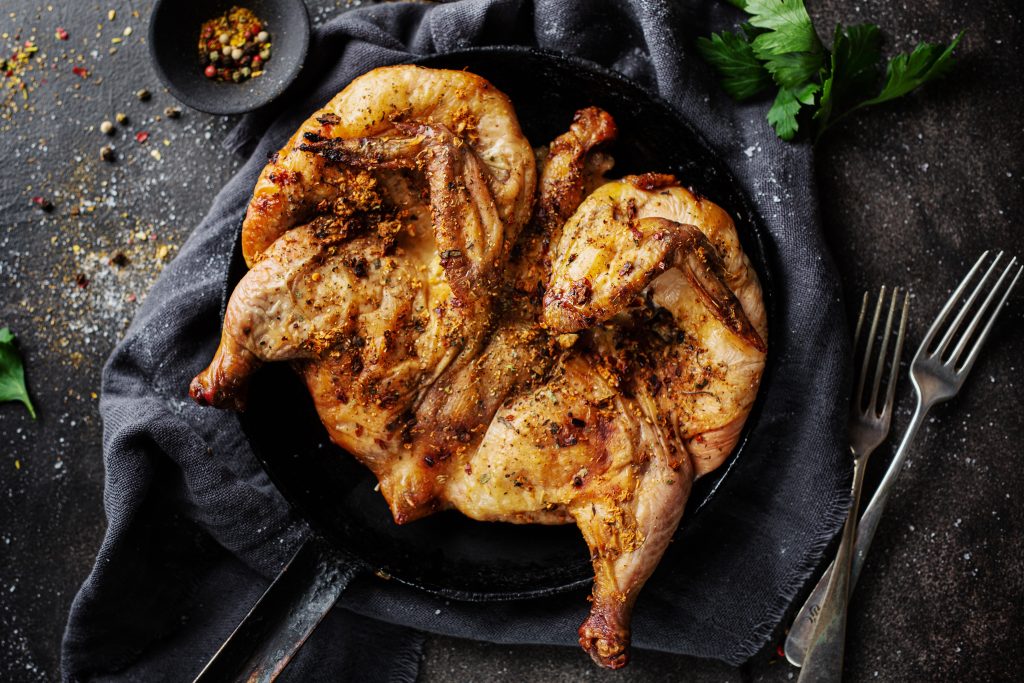
What You’ll Need:
1 whole chicken, about 1 1/2kg
1 lemon, halved
2 garlic cloves
Thyme or rosemary sprig
50g soft butter
800g, very small salad potato, or half large potatoes
350g small carrots, or three to four regular carrots, into chunks
1 tablespoon olive oil
300ml chicken stock
1 tablespoon low-salt soy sauce
Instructions:
Adults should heat the oven to 220°C/200°C fan/gas 7. Children can help stuff the chicken with lemon halves in the chicken cavity with the garlic and herbs.
Place the chicken in a large roasting tin, and use your hands to smear the butter all over it.
Afterwards, put the carrots and potatoes into a large bowl, drizzle the oil over and toss everything together with your hands. Make sure the vegetables are evenly layered around the chicken and season everything.
Next, put the chicken in the oven, then roast it for 30 minutes. Remove from the oven, then stir the vegetables. Reduce the heat to 200°C/180°C fan/gas 6, then return to the oven for 50 minutes more.
To test if the chicken is cooked, pull the leg and ensure there’s no sign of pink and the juices run clear. The digital cooking thermometer should read more than 70°C, then take the chicken out of the tin.
After scooping the vegetables into a serving dish, using a spoon or a pair of tongs. Use a potato masher to release all the juice from the lemons.
Now, strain the sauce. Pour in the chicken stock and soy sauce and stir well. Your child can hold a sieve over a jug while you lift up the pan and strain the juices into the jug. You can also reheat in a pan or in the microwave.
Recipe and image courtesy of BBC Good Food.
Super Fudgy Brownie
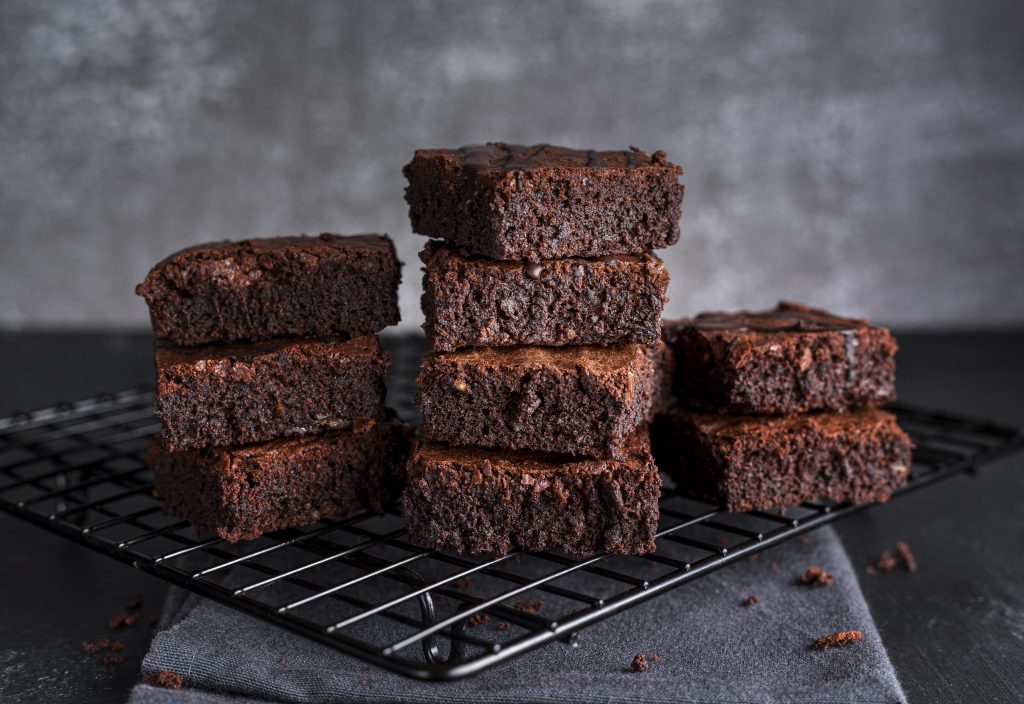
What You’ll Need:
1 1/4 cup all-purpose flour
1 teaspoon kosher salt
1/4 cup unsweetened cocoa powder
2 cups chocolate chips, divided
1 cup or two sticks of butter, cut into one-inch pieces
1 1/2 cup granulated sugar
1/2 cup packed brown sugar
5 large eggs, room temperature
2 teaspoons pure vanilla extract
Instructions:
Preheat the oven to 177°C. Butter a 9 by 13 inch (or 23 by 33 cm) baking pan, then line with parchment paper. Whisk together flour, salt and cocoa powder in a medium bowl.
Over a saucepan of simmering water that creates a double-boiler, place a large heat-proof bowl. Next, add butter and 1 1/2 cups of chocolate chips to the bowl.
Stir until the chocolate and butter are completely melted and smooth. Now, remove the bowl from the heat, and then whisk in the sugars and stir until everything is combined.
One at a time, add eggs, and stir well each time you do so. After adding in all the eggs, stir in vanilla. Combine the flour and chocolate mixture, then fold in dry ingredients with a rubber spatula. Now, fold in the remaining chocolate chips.
Next, pour the batter into the prepared pan. When you insert a toothpick into the center, it should come out with a few moist crumbs. This should take about 30 minutes. Now, let cool completely in the pan.
Recipe credit: Delish
Relevant Reads: Father’s Day Special: Being Involved Dad at Home and Work
This post originally appeared on Motherswork.


